Returned Goods Purchase Order
Returned Goods PO is used to send goods back to the vendor to receive a credit.
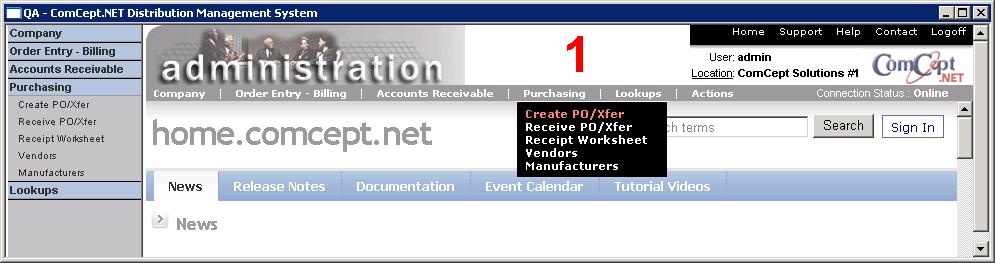
Navigation to the Screen
h
Select
Create PO/Xfer from the
Navigation Bar or from the Drop Down Menu
Purchasing.
Returned Goods Purchase Order Screen
RGPOs are part of the Purchase Order screen. Select Returned Goods from the
PO Type dropdown.
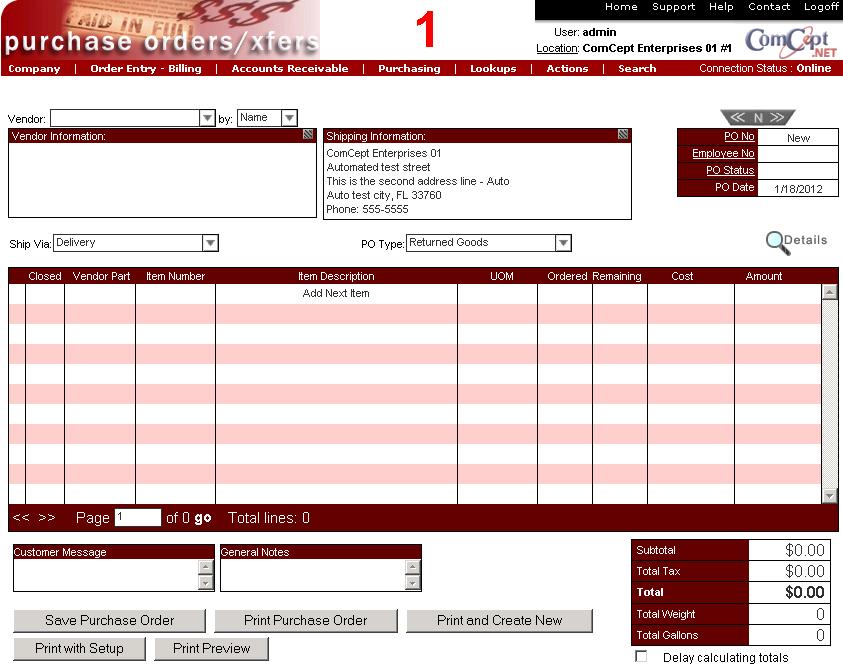
It is important the
User and the
Location are correct because multiple users and locations can be accessed from the same computer. These are located in the top right area of the screen.
The purchase orders/xfers screen is made up of six areas:
- Vendor and shipping information.
- Purchase order information, search, and control.
- Item ordering and costing.
- Customer messages and notes boxes.
- Purchase order tax and totals boxes.
- Purchase order Actions Icons.
- Vendor and Shipping Information:
Purchase Order Information, search, and control:
Item Ordering and Costing:
Customer Messages and Notes Boxes:

Purchase Order Tax and Totals Boxes:
Purchase Order Actions Icons:

Note: The following sections are in the same order that the
(Tab) key follows during date entry.
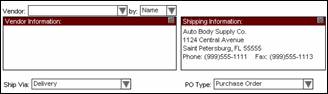
Vendor and Shipping Information
The vendor and shipping information and PO type area:
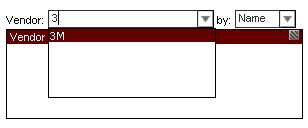
Vendor Information
Select the desired vendor using the two drop down boxes
Vendor: and
by:
In the
Vendor field:
- Begin typing the vendor’s name.
- Then press (Tab) to select name or select with the mouse.
- Or use the vendor search by: Customer Number (old vendor number from conversion).
- Select the desired Customer Number (i.e. Vendor Number).
- Or use the vendor search by: Short name.
- Select the desired Vendor Short Name.
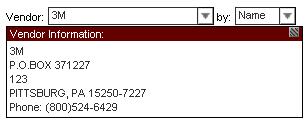
After the vendor has been selected, the vendor name and address are displayed.
Select the
Address Edit button on the far right of the
Vendor Information heading line to open the
Custom Details (Vendor Details) window. Changes made in this window are not permanent and will print on this purchase order/xfer only.
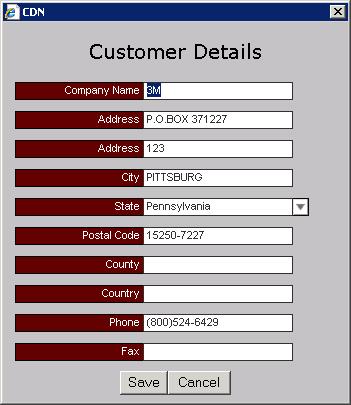
Select the
Save button to save changes or
Cancel to discard changes.
Vendor Search By Box
The second drop down box is used to specify the valued to be searched for in the Vendor drop down box (please see above).
Customer Number: The customer number field if entered on the Customers Information screen. This usually contains the old customer number from a conversion.
Description: The description entered in the Customers task.
Name: The vendor name.
Number: The vendor internal CDN number.
Short: The vendor short name.
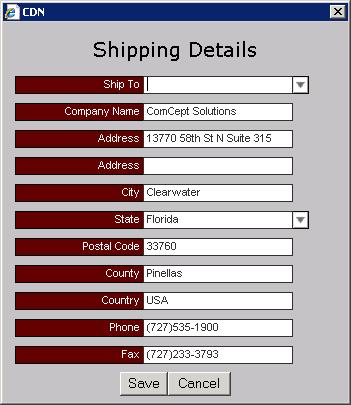
Shipping Information
The shipping information for the current location is automatically displayed when the
Create PO/Xfer task is selected.
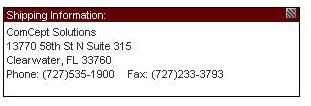
Select the
Address Edit button on the far right of the
Shipping Information heading line to open the
Shipping Details window. Changes made in this window are not permanent and will print on this purchase order/transfer only.
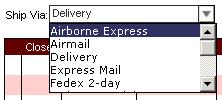
Ship Via
The Ship Via drop down window allows the selection of the shipping method.
PO Type
Use the PO Type drop down box to select the type of purchase order to be created:
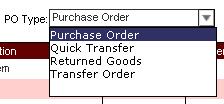
- Purchase Order: Regular purchase order from vendor.
- Quick Transfer: Location transfer purchase order from another location and completes the Work Order and Shipment in the sending location.
- Returned Goods: Return Goods purchase order for items to be returned to the vendor.
- Transfer Order: Location transfer purchase order from another location.
Purchase Order Information, Search, and Control
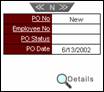
Purchase Order/Transfer Control Bar

The Purchase Order/Transfer Control Bar allows the selection of a previous PO/Xfer ,new PO/Xfer ,or next PO/Xfer selection bar. Tab through these unless you wish to cancel the current PO/Xfer entry and perform one of these functions.
PO Number
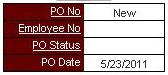
The PO/Xfer number (i.e. 123456) is assigned by CDN when the PO/Xfer is printed or saved. This field contains the word ”
New“ until the PO/Xfer is printed or saved the first time.
Employee Number
The employee number can entered in the
Employee NO field immediately below the
PO No field (see above) or in the Employee Number dialog window which is displayed when a PO/Xfer is saved or printed.
Note: The employee number must be created using the
Employees task before it can be used.
PO Date
The purchase order date is printed on the purchase order and is pre-loaded with the current system date (display only).
Header Details
Select the Display button to open the Purchase Order header details display window. The information cannot be changed from this window.

Order Time: The time the PO/Xfer was created (display only).
Created By: The employee number used to create the PO/Xfer (display only).
Last Modified By: The last employee number used to modify the PO/Xfer (change, print, save, etc.) (display only).
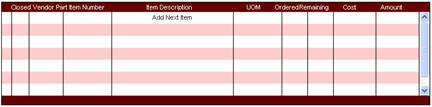
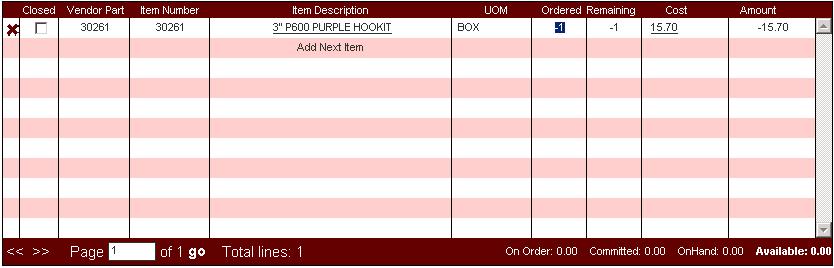
Item Ordering and Costing
Item Ordering
The item ordering and costing area of the purchase order is used to enter items to be purchased from the vendor.
Delete Button
Select the Delete button

to delete an individual line on the purchase order without leaving any history. Once a line is deleted, it must be re-keyed to reverse the delete.
Closed CheckBox
Select the
Closed checkbox to cancel an individual line on the purchase order leaving a history record. The line will turn to grey to indicate that it is closed. The line can be re-opened by deselecting the
Closed checkbox.
Vendor Part
This field allows the entry of the Vendor's Part number that will then be printed on the purchase order along with the CDN Item Number. Also, a vendor part entered in the
Master Inventory task in the
Unit of Measure/Pricing section will automatically fill this field when the unit of measure is selected.
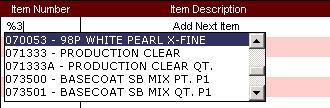
Item Number
Select the desired item using either the
Item Number or the
Item Description columns.
Item Number column:
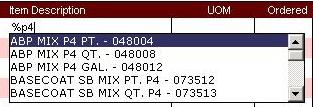
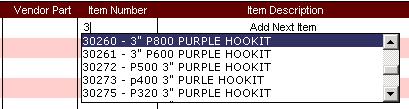 Item Description
 column:
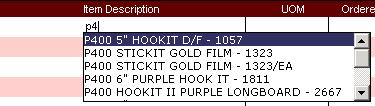
% wild card character:
You can also use the down arrow to open the item or description drop down box and then scroll search for the desired item. This can be inefficient for item files with a large number of Items. Select the highlighted Item by pressing the
Tab key or using the mouse.
Item Description
You can edit the Item Description and even add an extended description or comment if desired. Simply re-select the underlined Item Description to open the Item Description Edit Dialog Window.
Changes made are kept only for this line item on this purchase order.
UOM - Unit of Measure
The
UOM field is used to select the desired purchasing unit of measure.
If there is more than one purchasing unit of measure for the item, the drop down box opens automatically. However, the item is immediately priced using the
Default Purchasing UOM (set up in the
Master Inventory task).
Highlight the desired unit of measure and then press the (Tab) key or use the mouse.
Note: By re-selecting the unit of measure field for any line, you can display the On Order, Committed, OnHand, and Available fields on the bottom of the
Item Ordering and Costing area.
Ordered
The quantity
Ordered field is next. Enter the quantity to be ordered from the vendor and then press (Tab).
Remaining
The quantity Remaining field is next (display only). The quantity remaining on order with the vendor is displayed (starts out being the same value as the Ordered quantity.
Cost
The
Cost field is next. Press (Tab) to accept the
Published Cost as specified in
Master Inventory task or select the
Cost field with the mouse to open the
Line Item Details window. The cost can then be changed using this window.
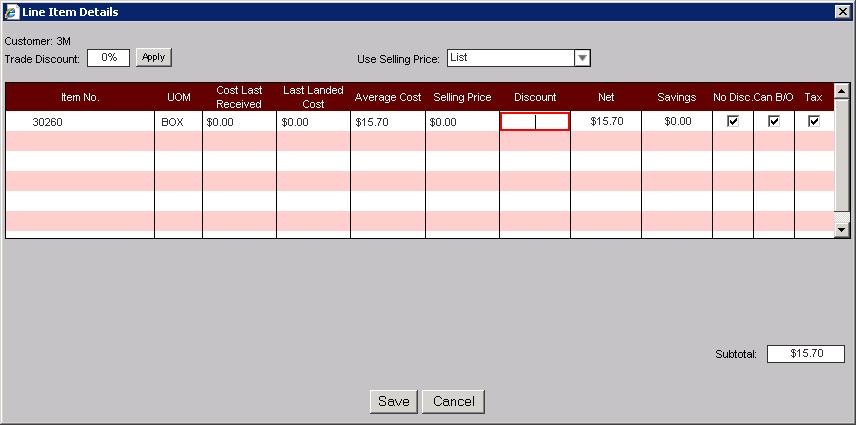 Customer: Trade Discount:
 The discount percent that will be applied to all lines on the purchase order if the
Apply button is selected. A default can be maintained in the customer/vendor record in the
Trade Discount field. (Note: The vendor must be flagged as an
Is Bill To in the
Customers task to access this field).
Use Cost: Select the desired cost to be displayed in the
Cost column (i.e. Average, Last Landed, or Published Cost). Changing the
Use Cost causes the gross profit percent in the
GM column to be recalculated.
Item No: The item number entered on the purchase order. Display only.
UOM: The item unit of measure. Display only.
Cost: The cost for the item determined by the selection in the
Use Cost drop down box. Display only.
List: The List Price for the Item. Display only.
Profile: Reserved for future use.
Discount: Additional discount off of, or added to, the
Cost. The desired value may be entered.
Net: The net cost after any additional discount. The desired value may be entered.
Savings: The difference between the
Cost and the
Net cost. The desired value may be entered.
GM: The "gross margin" (i.e. percentage above or below) between the
Net cost and the Cost. The desired value may be entered.
No Disc: Select this box to remove a discount entered and return the
Net cost to the original Cost.
Can B/O Select this box to cancel back ordered quantities.
Tax: Select this box to charge sales tax on the line item or deselect to not change sales tax.
Subtotal: The running subtotal for the purchase order.
Select
Save to record the costing changes or
Cancel to discard the changes and keep the original costing.
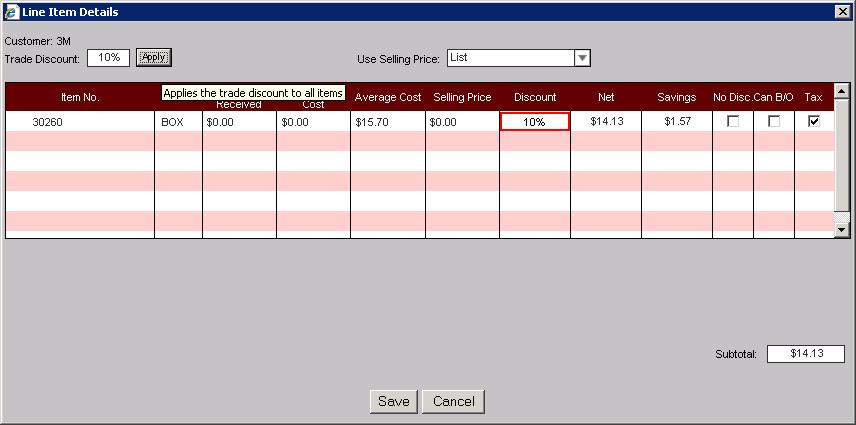
This example shows the Line Item Details window from above with a
Trade Discount of 10% applied to the purchase order.
Customer Messages and Notes Boxes
Customer Message
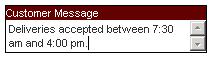
A free form
Customer Message can be keyed in this box and will be printed in the body of the purchase order below the Total Due line.
General Notes
Reserved for future use. The General Notes are display only.
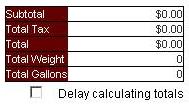
Purchase Order Tax and Totals Boxes
The purchase order tax and totals boxes are made up of at least three totals boxes (if no sales tax is owed) and at least four totals boxes (if sales tax is owed). There may be additional sales tax boxes depending on how many sale tax jurisdictions are involved.
Subtotal: The total of the items ordered from the vendor before sales tax is applied.
Pinellas: The sales tax jurisdiction that this purchase order falls under. This is determined using a combination of the
Taxes task under
Company,
Tax Group field in the
Master Inventory task under
Company, and the
Tax Model field in the
Customers task under
Accounts Receivable.
Total Tax: This is the total of all sales tax for all jurisdictions on the purchase order.
Total: This is the total of the extended items costs and all taxes.
Create PO/Xfer Action Icons
Note: The
On Order quantity for the items on the purchases order is updated as soon as the purchase order is saved or printed.
Save
The
Save button saves the purchase order and the purchase order remains on the screen. This message

is display to indicate the purchase order has been saved. This action updates the on order quantity.
Print
The
Print button saves the purchase order and opens the Windows Printer window so that the purchase order can be printed to the desired printer. The purchase order remains on the screen. This message
is displayed to indicate the purchase order has been printed and saved. This action updates the on order quantity.
Print & New
The
Print and New button saves the purchase order and opens the Windows Printer window so that the purchase order can be printed to the desired printer and then displays a blank purchase order screen. This action updates the on order quantity.
Confirm Save Window
The
Confirm Save window is displayed if you have made changes to the current screen and attempt to start a new purchase order or change to another action.
- Yes - Saves the information changed on the screen before continuing.
- No - Discards the information changed on the screen before continuing.
- Cancel - Returns to the current screen allowing further changes.
Purchasing Orders/Xfers Actions Menu
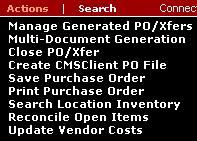
The following actions are available from the
Actions dropdown menu while in the
Create PO/Xfer task.
- Manage Generated PO/Xfers
- Multi-Document Generation
- Close PO/Xfer
- Create CMSClient PO File
- Save Purchase order
- Print Purchase order
- Search Location Inventory
- Reconcile Open Items
- Update Vendor Costs
NOTE: The save and print purchase order action menu items are also available as buttons on the screen.
Manage Generated PO/Xfer
This is covered in the
Manage Generated PO/XFers Help Documentation.
Multi-Document Generation
This is covered in the
Inventory Document Generation document.
Close PO/Xfer
This action closes the displayed Returned Goods Purchase Order. Open line items must be checked as
Closed to cancel remaining open on order quantities. This action can be reversed by adding a new line item to the end of the purchase order.
Create CMSClient PO File
This allows the user to generate a file that can be uploaded to the 3M site.
Save Purchase Order
Saves the Returned Goods Purchase Order that appears on the screen.
Print Purchase Order
Prints the Returned Goods Purchase Order that appears on the screen.
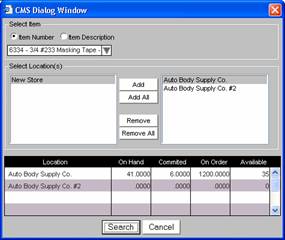
Search Location Inventory
This action displays the current on hand, committed, on order, and available on hand for the locations selected.
Reconcile Open Items
This process checks all open PO type documents then reconciles the on hands of all the items to match.
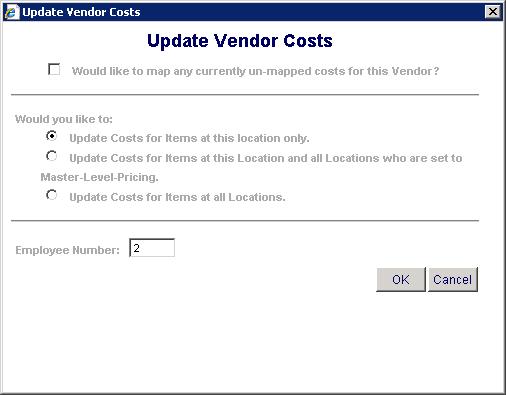
Update Vendor Costs
This process updates the vendor costs of the selected vendor for one or all locations.
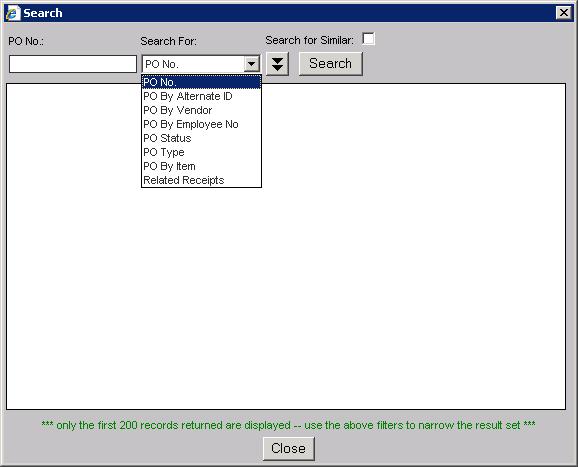
Purchase Orders/Xfers Search Menu
The Purchase Order/Xfers search action is an extremely powerful tool allowing the selection of desired purchase orders by a wide variety of search field combinations.
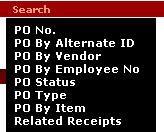
Purchase order searches are started by selecting one of the search links:
- PO No
- Employee No
- PO Status
Or by selecting a Search option from the Menu bar:
Search options can be changed after the Search window is open. Also, select the
Down Arrow button to open the Date Range and Customer/Vendor filter options. This secondary filter option can be closed by selecting the
Up Arrow button.
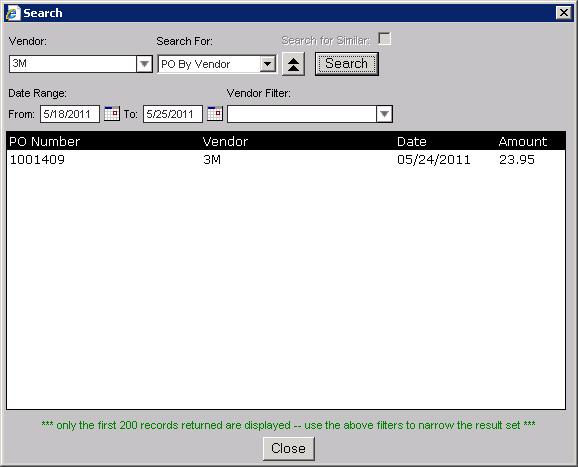
Note: For a
Date Range search, you must enter both the
From and the
To dates for the search to function correctly.
PO by Alternate ID
Reserved for future use.