Mobile Suite - Orders
Mobile Orders are designed to allow the salesman to create an order for a customer from their mobile device.
Create a Mobile Order
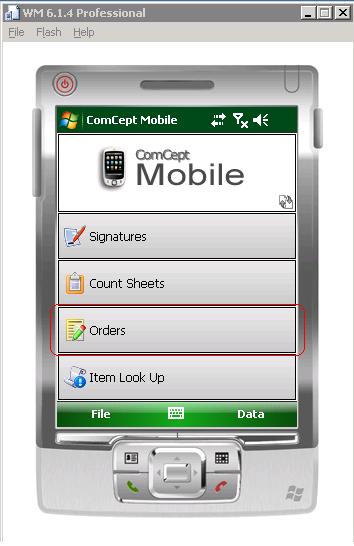
1 Select the
Orders button on the Mobile Suite splash screen.
2 Select the
Add button.

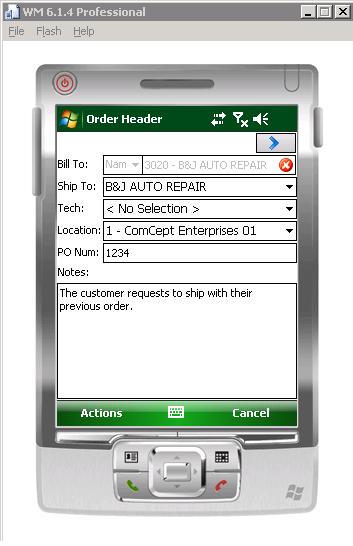
3 Type and select the customer from the
Bill To smart dropdown. The
Ship To field will be autopopulated.
4 OPTIONAL Select a different ship to from the
Ship To dropdown. All of the ship tos related to the bill to will be available in the dropdown.
5 OPTIONAL Select a technician from the
Tech dropdown. All of the bill to's technicians will be available in the dropdown.
6 OPTIONAL Select a location from the
Location dropdown. The default value is the location assigned to the customer.
7 OPTIONAL Type a PO number into the
PO Num field. This number will be applied to the Work Order that will be generated from the the mobile Order.
8 OPTIONAL Type a note into the
Notes field. This will also be applied to the Work Order.
9 Select the
> button or select
Next from the Action menu.
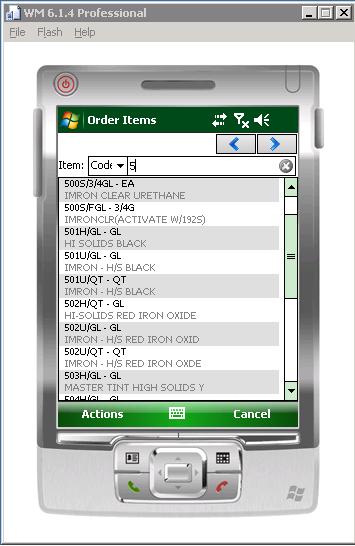
Add Items to the Order
1 Type the part number or description into the Item smart dropdown. If description is typed, the user will jave to select desc. from the dropdown in the Item field.
2 Select the desired items from the item dropdown.
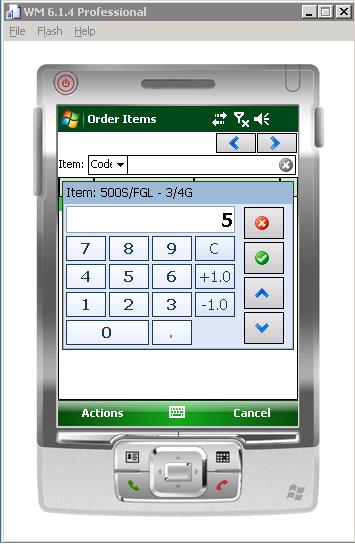
Edit items
1 Select an item on the order items screen. The item calculator will appear.
2 Select the quantity that needs to be ordered from the calcultor.
3 OPTIONAL Select the
Up or
Down arrow to view the previous or next item.
4 Select the green
check mark button.
On Hands / Price
1 Click and hold on an item to display the item menu.
2 Select the
On Hands / Price option from the menu. The Item Info screen will be displayed. The Item's Price, On Hand, On Order and Committed quantities are displayed.
3 Select the
ok link at the top right of the window to close the window.
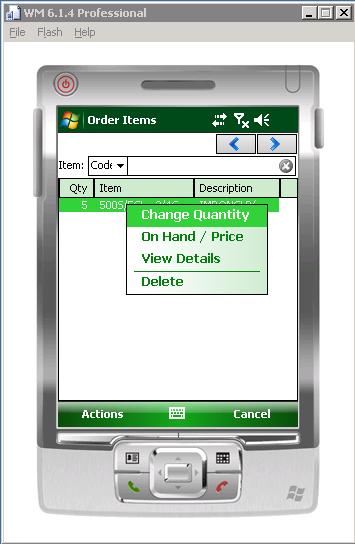

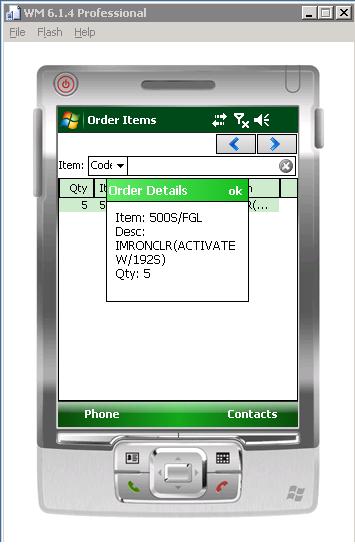
View Details
1 Click and hold on an item to display the item menu.
2 Select the
View Details option from the menu. The Order Details window appears.
3 Select the
ok link at the top right of the window to close the window.
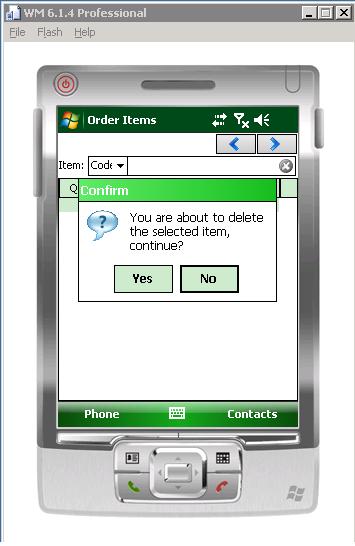
Delete an Item
1 Click and hold on an item to display the item menu.
2 Select the
Delete option from the menu.
3 Select the
Yes button. The item will be removed from the order.
Select the
No button to cancel the delete process
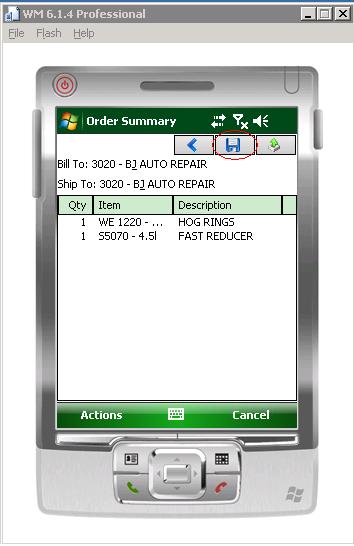
Process an Order
Once all of the items have been added and modified as desired select the
> or
Next from the Actions menu. The Order Summary screen will be displayed. From this screen the salesman has a choice, send the order or save it for later.
Send
Sending the order to the store personnal is the recommended option. This process will send the order from the mobile device to the store as a Work Order.
Select the
Send button or
Send from the Actions menu.
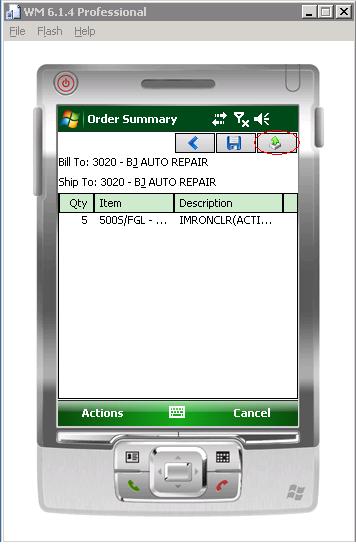
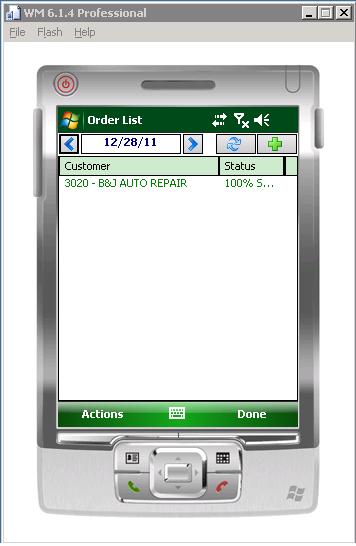
The mobile device will attempt to send the order. If it completed successfully the order will display with green font, if it fails it will be red.
Save
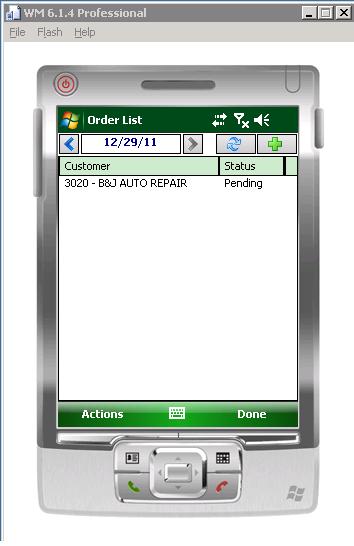
This option will save the order. It allows the salesman to apply more changes to it and send it at a later date. This will save the order as Pending.
Select the
Save button or
Save from the Actions menu.
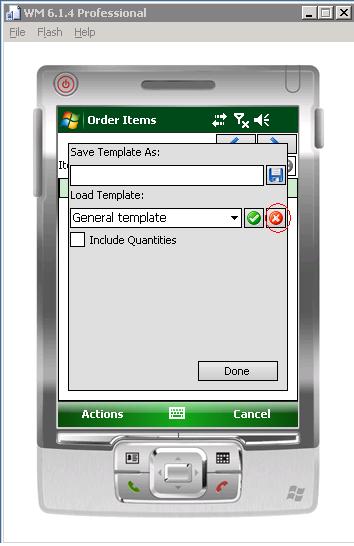
Templates
Templates are designed to allow the salesman to quickly add items to an order. A salesman can build a template and reuse it for future orders.
From the
Order Items screen, select
Templates from the Actions menu. This window will allow the salesman to generate new templates, load templates to add new items to the order and delete unneeded templates.
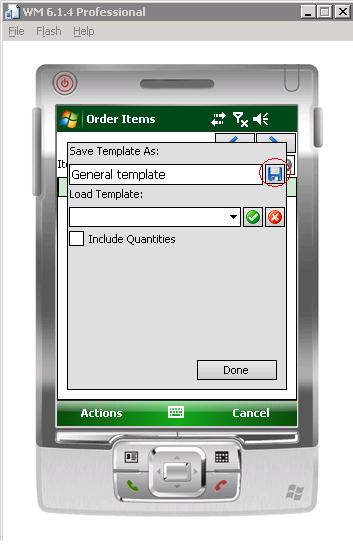
Create a Template
1 The salesman needs to generate an order with all of the items they would like to be placed on the template.
2 Select
Templates from the Actions Menu. The Template screen will be displayed.
3 Type an appropriate name into the
Save Template As field. Note: This name will be the name of the template.
4 Select the
Save button. It is the disk icon next to the
Save Template As field.
5 Select the
ok link on the message that displays.
6 Select the
Done button.
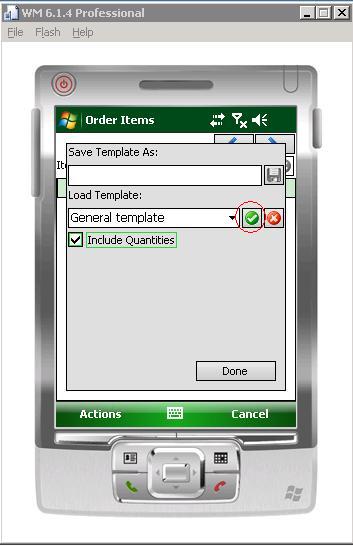
Load a Template
1 Create an order until the Order Items screen is displayed.
2 Select
Templates from the Actions menu.
3 Select the desired template from the
Load Template dropdown.
4 Select the
Include Quantities checkbox if the quantities from the template should be on the new order.
5 Select the green checkmark button. All of the items from the template will populate the new order and a message stating xx item(s) have been added to the order.
6 Select the
oklink on the message that displays.
7 Select the
Done button.
Delete a Template
1 Create an order until the Order Items screen is displayed.
2 Select
Templates from the Actions menu.
3 Select the desired template from the
Load Template dropdown.
4 Select the red x button next to the
Load template dropdown. A message should display ask if you are sure you want to delete the template.
5 Select the
Yes button. The
No button will cancel the delete process.
6 Select the
oklink on the message that displays.
7 Select the
Done button.