Page History: CollisionLinx Orders Help Documentation
Compare Page Revisions
Page Revision: 05/29/2012 11:52 AM
OrderLinx Orders
OrderLinx Orders allows the user to generate orders at the shop and send them directly their distributor.
Associated Permissions
Opening OrderLinx
1 Open an internet browser. IE is the supported browser.
2 Type orderlinx.net into the
URL field.
3 Type the vendor code into the
Vendor field.
4 Type the login into the
Login field.
5 Type the password into the
Password field.
6 Select the
Login button.
Navigating to the Orders Screen
Select the
Orders tab.

Screen Descriptions
Order List Screen
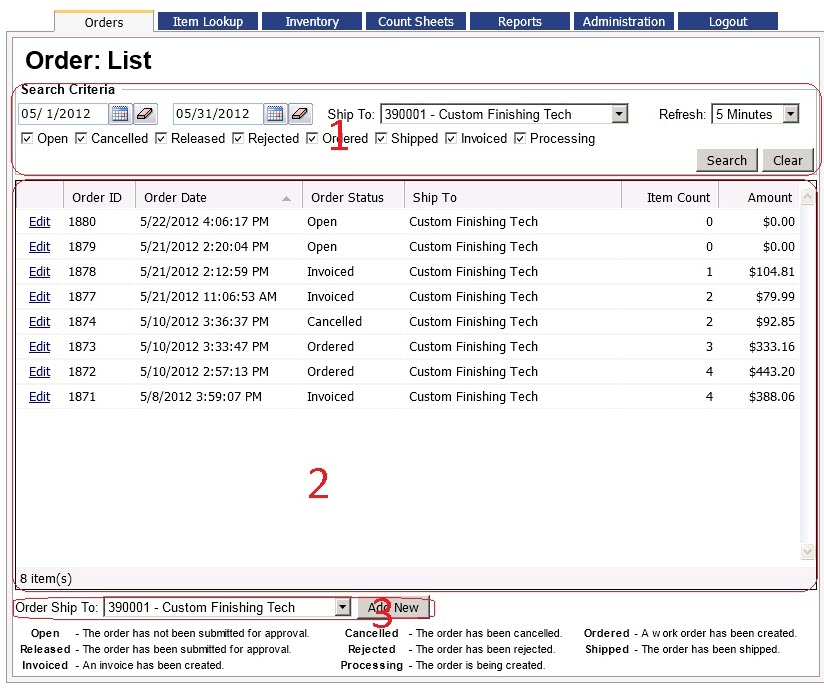
Section Descriptions:
- Search Criteria - This section displays all of the search parameters that can be used to find orders.
- Order Grid - This section displays all of the orders that meet the criteria of the search results.
- Add Order - This section allows the user to create a new order.
Section 1 - Search Criteria
This section defaults to the current bill to/ ship to, current month and all document statuses.
Section 2 - Order Grid
This section shows all of the orders that match the search criteria. The orders can be sorted by using clicking on the column header.
The
Edit link allows the user to go to the Order Edit screen.
=Section 3 - Add New Order
This section allows the user to create new orders. If the user is a bill to user, thry will be able to see all ship tos. If the user is a ship to user, they can see all other ship tos if they have the correct permission.
Create/Edit an Order
Order Edit Screen
The Order Edit screen allows the user to alter an order. Below is a disgram of all the sections.
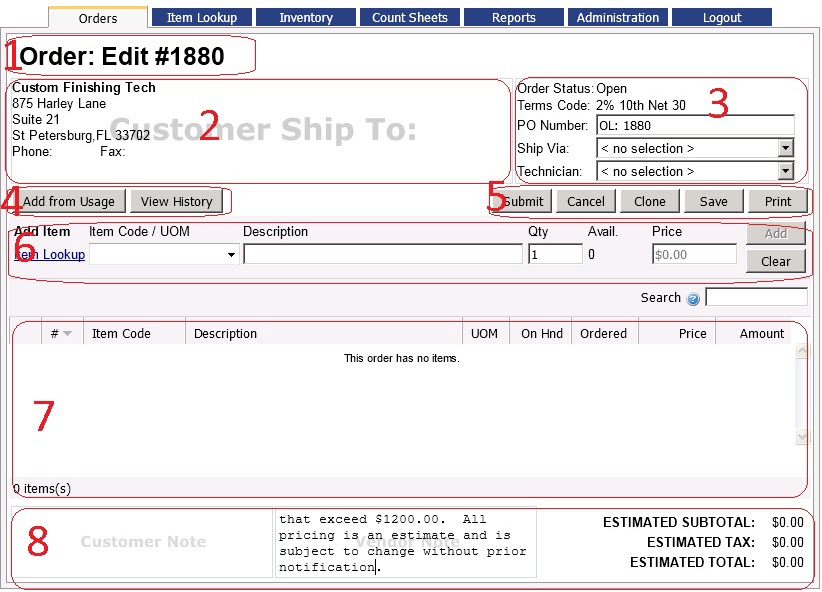
Section Descriptions:
- Order Number - Provides the user with the order number that you are editing.
- Ship To - Displays the company name and address the order is going to be shipped to.
- Order Information - Displays information about the order.
- Order Building and Tracking - These buttons allow the user to automatically build orders and track the progress of an order.
- Action Buttons - These buttons allow the processing of an order.
- Pending Item - Shows the user the item they are about to add to an order.
- Item Grid - Displays all of the items already on the order
- Order Details - displays important information about the order.
Section 1 - Order Number
=
This sections only purpose is to display the order number.
Section 2 - Ship To
This section shwos the ship to information including the company name, address, phone number and fax number.
Section 3 - Order Information
This section displays some important information about the order.
Order Status
This tells the user what status the order currently is in.
Orders can be in one of eight different statuses.
- Open - Orders that are in Open status are completely editible.
- Cancelled - This means the order was cancelled by the OrderLinx user.
- Released - The order was sent to the distributor.
- Rejected - The distributor rejected the submitted order. The distributor should contact you with the reason why the order was rejected.
- Ordered - means the distributor accepted the order and is busy preparing the order.
- Shipped - means the order has been processed and is currently being delivered to the ship to location.
- Invoiced - means the order has been invoiced and the distributor will be sending the invoice to the bill to shortly
- Processing - Means the order is being worked on my a background task. This status will be rarely seen.
An order's natural flow of statuses is:
- Open
- Released
- Ordered
- Shipped
- Invoiced
Section 4 - Order Building and Tracking
These buttons are useful to build an order from usage or track the progression of an order.
Add from Usage button
The
Add from Usage button brings up the screen below.
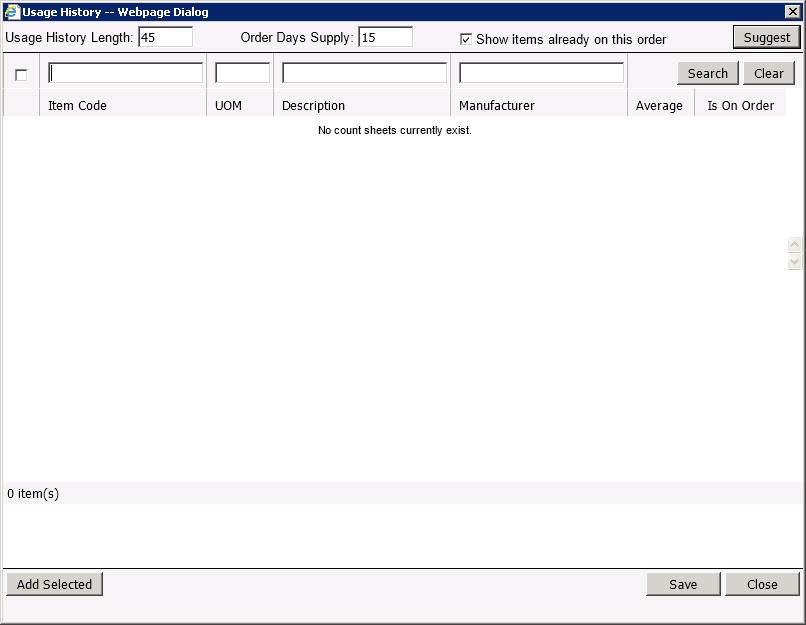
The screenshot above doesnt suggest any items, because this login to OrderLinx doesn't process orders constantly.
The Usage History Length and Order Days Supply always default to 45 and 15 respectively.
The user can do the following:
- Select individual items to add to the order
- Select or deselect all of the items
- Adjust the order amounts
- Search for particular part numbers
Once the user has specified all of the items they would like on the order and the quantity of each, they will have to select the
Add Selected button. All of the selected items on the window will appear in the item grid, section 7, with the specified quantity and the Usage History window will disappear.
View History button
This button allows the user to see the history of the order. It will display the status of the OrderLinx order and all of the related documents. Below is a example of an OrderLinx order that has been processed to Invoice.

Section 5 - Action Buttons
These buttons allow the user to do many things to the order.
Submit button
The submit button finalizes the order. This should only be selected with the OrderLinx user is completed with the order and wants to send it to the disributor.
Cancel button
The cancel button will cancel the order. This should only be used if the OrderLinx user does want the order anymore. There is no way to reopen the order. The only way to salvage the items on the order is to clone the order to a new order.
Save button
This button allows the user to save all of the pending changes on the order. This will only save the order. It will not send it to the distributor.
Print button
The print button allows the user to print the order. It is recommended to save the order first.
Section 6 - Pending Items
The pending item section allows the user to add items two different ways.
- Manually type an item
- Item Lookup
If you know the item code or part of the item code the fastest way to add an item is to manually enter it. In the
Item Code / UOM field type the item code. A dropdown will appear with part numbers close to what you typed.
If you only know a part of the item (example: You only know 1487 and you want to find SG1487/QT), type % before the part you know. The dropdown will find all part numbers with 1487 in it.
Item Lookup
Item lookup should only be used if you are unsure of the item part number.
Section 7 - Item Grid
====Section 8 - Order Details====
Clone an order
Edit an Existing Order
Processing an Order
Submitting an Order
Cancel an Order
=