Page History: Vendor Help Text
Compare Page Revisions
Page Revision: 05/19/2011 10:35 AM
Vendors
This task is used to search, edit, or inquire into the vendors on your system.
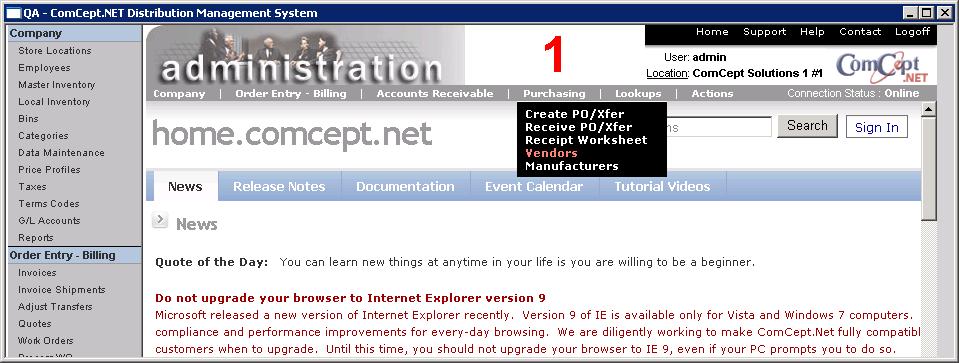
Select
Vendors from the
Navigation Bar or from the Drop Down Menu
Purchasing.
Search For Vendors
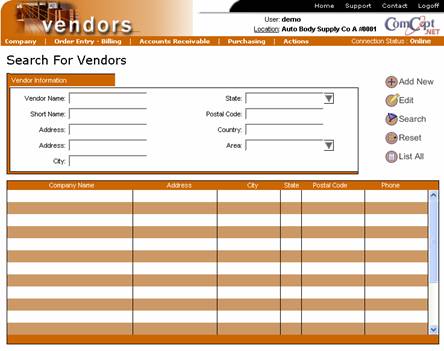
The Search For Vendors screen is the first screen that is displayed when the Vendors task is selected. This screen is used to search for Vendors that exist on the system. Individual Vendors can then be selected for inquiry or editing from those displayed.
The work area or screen area is made up of the following three sections:
The search fields (top center).
The screen action buttons (top right).
The record display area (bottom half).
Add New Vendor Action
To add a new vendor, select the action button from the Search For Vendors screen.
-or-
Select the Add New Vendor option located on the drop down menu Actions.
General Information
General Information
Vendor Name: This is the legal company name for the vendor. This will be printed on purchase orders, invoices, work orders, quotes, statements, etc.
Short Name: This is a descriptive short name for the vendor.
Is Customer: Select this box if the customer is active for billing invoices or receiving payments.
Tax Model: Select the Tax Model from the drop down box if the Is Customer box was selected. Customer Tax Models must be set up prior to use in the Taxes task in the Company section.
Is Manufacturer: Select this box to indicate that this is a valid manufacturer for use in Inventory, Pricing, and Purchasing tasks.
Is Active: Select this box to indicate that this is a valid vendor for use in Inventory, Pricing, and Purchasing tasks.
Address and Contact
Address 1: This is the first line of the vendor’s address.
Address 2: This is the second line of the vendor’s address.
City: This is the city for the vendor’s address.
State: This is the state for the vendor’s address.
Postal Code: This is the postal code (zip code) for the vendor’s address.
County: This is the county where the vendor is located.
Country: This is the country for the vendor’s address.
Area: Reserved for future use.
Phone: This is the vendor’s main phone number.
Fax: This is the vendor’s main fax number.
Email: This is the vendor’s main e-mail address.
Website: This is the vendor’s web site.
Date Updated: This is the date the record was last updated (maintained by CDN).
Date Created: This is the date the record was created (maintained by CDN).
Contacts
Contacts
Vendor Contacts: Vendor Contacts can be an individual, department, service, etc. for which a name, address, phone number, etc. needs to be kept on file. Multiple Vendor Contacts can be maintained for a vendor.
Select this button to add a new Vendor Contact.
Select this button to edit an existing Vendor contact. You must first select the vendor contact to be modified.
Select this button to delete an existing Vendor Contact. You must first select the vendor contact to be deleted.
Contact Info Dialog Window
The vendor Contact Info CDN Dialog Window will display if the Add or Edit buttons were selected.
Select (Ok) to save changes or (Cancel) to discard changes and exit. Contact Info
First Name: Enter the first name for the contact. This field is displayed in the Contacts list window.
Last Name: Enter the last name for the contact. This field is displayed in the Contacts list window.
Middle Init: Enter the middle initial for the contact.
Title: Enter the title for the contact. This field is displayed in the Contacts list window.
Address 1: First line of the street address.
Address 2: Second line of the street address.
City: The city where the contact is located.
State: The state where the contact is located.
Postal Code: The contact’s postal code (i.e. zip code).
Phone: The contact’s phone number.
Mobile: The contact’s mobile or cellular phone number.
Email: The contact’s email address.
To save the information keyed and actually create the new record, select the or the action button or the Save or Save and Close option located on the drop down menu Actions.
Edit Action
To edit or inquire into a Vendor, you must first select the desired vendor from the list of vendors returned by the Search action (see below) or from the List All action.
The following screen displays the information for an existing vendor. This is done by selecting the desired vendor followed by one of the actions below:
Select the desired entry and then select the action button.
Select the desired entry and then select the Edit Vendor option from the drop down menu Actions.
Double clicking the desired vendor search line.
Pressing the (Enter) key.
The fields on the Edit Vendor screen are the same as the Add New Vendor screen fields described previously.
The screen/menu actions below are described in the following sections:
Add New Action
Select the action button (Add New Vendor from the drop down Actions menu) to save or discard changes keyed and change to the Add New Vendor screen. The following confirmation window is displayed if and data was keyed:
Select the (Yes) button to save changes.
Select the (No) button to discard changes.
Select the (Cancel) button to return to the Add New/Edit Vendor screen and continue making changes.
Save Action
Select the action button (Save from the drop down Actions menu) to save changes and remain in the current vendor record.
Save & Close Action
Select the action button (Save and Close from the drop down Actions menu) to save changes and return to the Search for Vendors screen.
Search Action
Search For Vendors Screen Fields
The search screen fields are used to build a filter so that the action (Filter from the drop down Actions menu) will display the desired vendors. Enter the beginning portion or the entire value in any or all of the desired search fields listed below. Some fields have drop down boxes to assist in entering values by displaying valid entries. These fields are indicated with the down arrow button (i.e. the State and Area fields).
Vendor Name: This is the legal company name for the vendor. This will be printed on purchase orders, invoices, work orders, quotes, statements, etc.
Short Name: This is a descriptive short name for the vendor. This field is often pre-loaded during conversion with the old vendor alpha from your company’s prior computer system. Address: This is the first line of the vendor’s address.
Address: This is the second line of the vendor’s address.
City: This is the city for the vendor’s address.
State: This is the state for the vendor’s address.
Postal Code: This is the zip code for the vendor’s address.
Country: This is the country for the vendor’s address.
Area: Reserved for future use.
Note: The less information keyed to get the desired filter the better. Use the fewest search fields to get the filter you desire. Also, if you key only the beginning portion of a field, all items beginning with the value entered will be selected.
In this example the search field used was the first Address line with the first part (i.e. “123”) entered.
The button is then selected and the two vendors that pass the filter are displayed in the record display area of the screen.
You can also select the Filter option located on the drop down menu Actions.
Reset Action
Select the action button (Reset Search from the drop down Actions menu) to clear the Search Screen and return it to the screen defaults so that a new search can be performed. This is the same as leaving the Search Screen and then again selecting the same Search Screen Task.
List All Action
Select the action button (List All from the drop down Actions menu) to list all the records in the file.