Page History: Security Help Documentation
Compare Page Revisions
Page Revision: 07/19/2012 01:14 PM
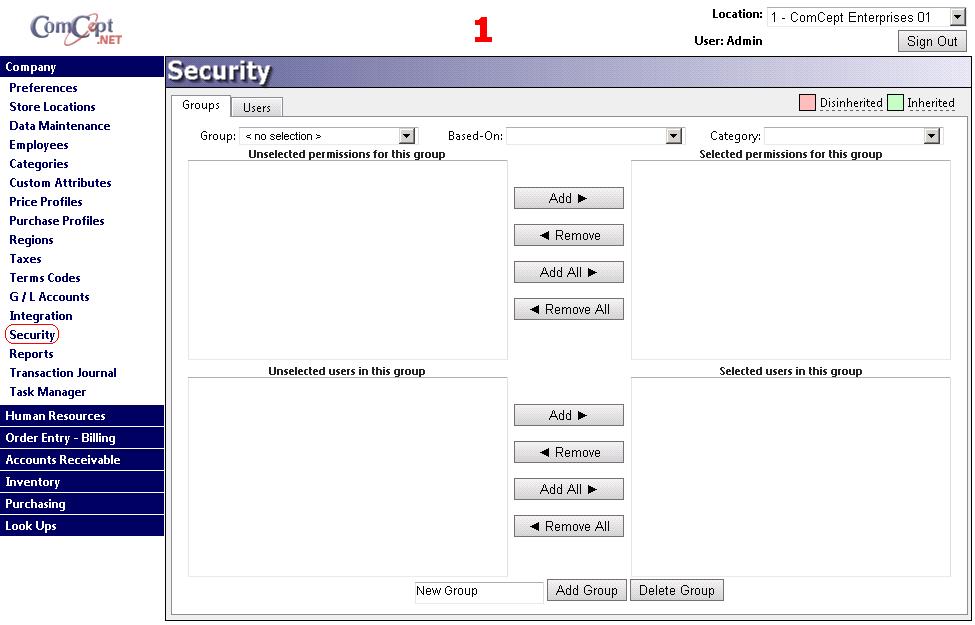
Security
The Security screen affects all of the screens in all of the applications.
Navigation to the Screen
The Security screen can only be accessed from CDN .Net Thin Client (Utopia).
Standard Security Groups
When a customer database is created standard security groups are automatically created. The groups have the permissions that each role in the organization will need to do the modualized task. All of these groups can be altered.
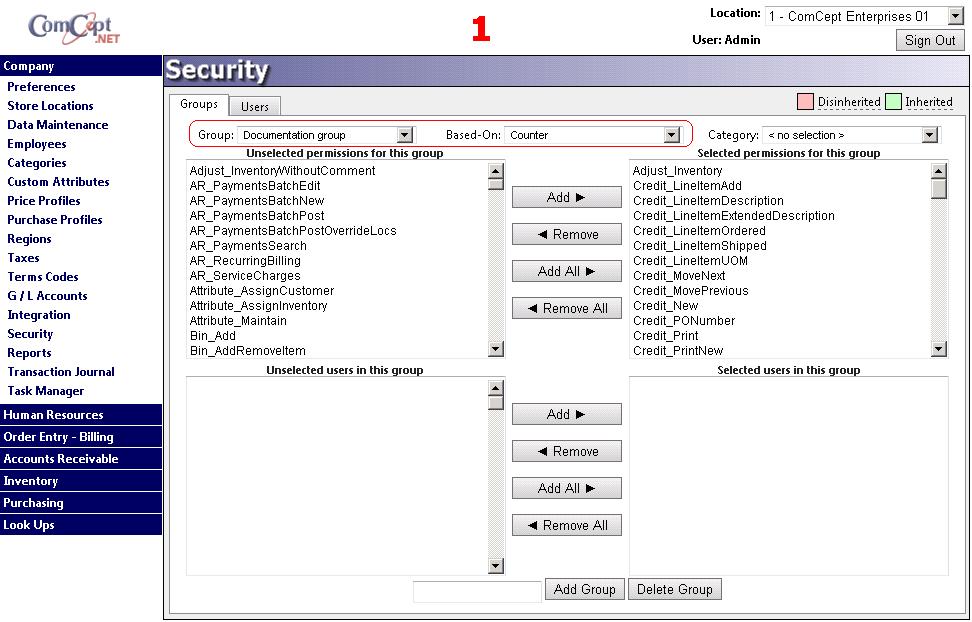
Add a New Group
New groups can be created to give permissions to a particular group of people that don't fit into the standard groups.
1. Type the new groups name into the
Name field at the bottom of the security screen.
2. Select the
Add Group button. The new group will appear in the
Group dropdown. 3. OPTIONAL: If the new group is going to be similar to another group, the user can select the similar group from the
Based-On dropdown. This step will automatically add all of the permissions in the similar group to the new group.
Add permissions
List of all security permissions with descriptionsAny permission can be added to any group.
1. Select the desired group from the
Group dropdown.
2. Select the desired permission from the
Unselected permissions for this group section. Multiple permissions can be selected by clicking on the first permission in a range then hold the shift key while clicking on the last permission in the range. The control key can add and remove individual permissions from the selection.
3. Select the
Add button.
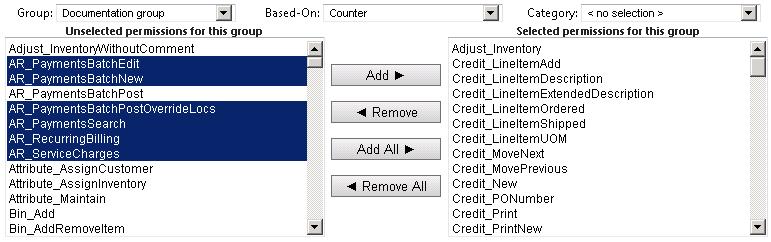
Below is an example of adding most of the AR permissions to a group.
Before the
Add button is selected:
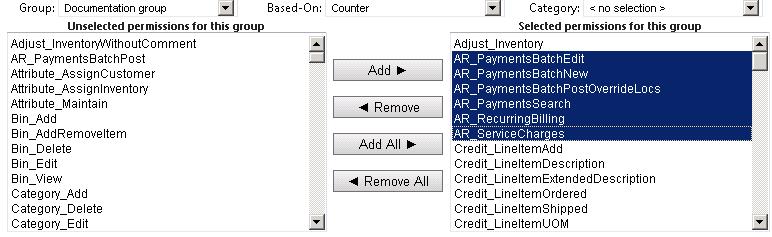
After the
Add button is selected:
Remove permissions
Removing a permission is the exact opposite of adding a permission.
1. Select the desired group from the
Group dropdown.
2. Select the desired permissions from the
Selected permissions for this group section. Multiple permissions can be selected by clicking on the first permission in a range then hold the shift key while clicking on the last permission in the range. The control key can add and remove individual permissions from the selection.
3. Select the
Remove button.
Add a user to a security group
Adding a user to a group is very similar to adding a permission.
1. Select the desired group from the
Group dropdown.
2. Select the desired user from the
Unselected users in this group section. Multiple users can be selected by clicking on the first user in a range then hold the shift key while clicking on the last user in the range. The control key can add and remove individual users from the selection.
3. Select the
Add button next to the users field.
Remove a user from a security group
1. Select the desired group from the
Group dropdown.
2. Select the desired user from the
Selected users in this group section. Multiple users can be selected by clicking on the first user in a range then hold the shift key while clicking on the last user in the range. The control key can add and remove individual users from the selection.
3. Select the
Remove button next to the users field.
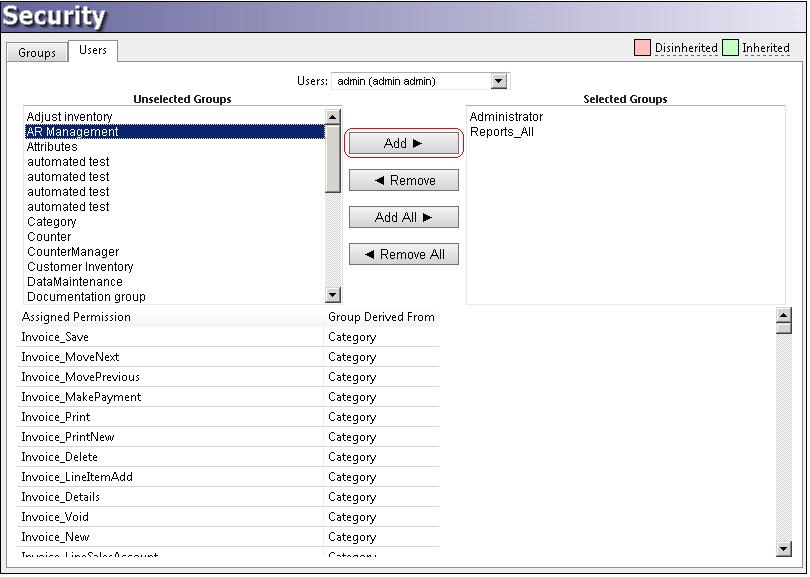
User tab
The users tab is used to lookup individual users to see which groups they currently have asigned to them. Groups can be added and removed from the user on this screen. The lower part of the screen will display all of the permissions the user has and from which group they got them from.
Add a group to a user
1. Select the
Users tab.
2. Select the desired user from the
Users dropdown.
3. Select the desired groups from the
Unselected Groups section. Multiple groups can be selected by clicking on the first group in a range then hold the shift key while clicking on the last group in the range. The control key can add and remove individual groups from the selection.
4. Select the
Add button.
Remove a group from a user
1. Select the desired user from the
Users dropdown.
2. Select the desired groups from the
Selected Groups section. Multiple groups can be selected by clicking on the first group in a range then hold the shift key while clicking on the last group in the range. The control key can add and remove individual groups from the selection.
3. Select the
Remove button.