Page History: CollisionLinx Count Sheets Help Documentation
Compare Page Revisions
Page Revision: 12/30/2011 11:27 AM
OrderLinx Count Sheets
OrderLinx count sheets are designed for the body shop or salesmen to count the shop's inventory in order to establish their current levels and what the shop needs to order.
Associated Permissions
CustomerCountSheet_AddAll - create a customer count sheet out of the customer's inventory
CustomerCountSheet_AddBlank - create an empty customer count sheet
CustomerCountSheet_AddUsage - see the usage of an item
CustomerCountSheet_CreateOrder - create a Work Order out of the customer count sheet
CustomerCountSheet_Delete - delete the customer count sheet
CustomerCountSheet_ItemAdd - add items to the customer count sheet
CustomerCountSheet_ItemDelete - delete items on the customer count sheet
CustomerCountSheet_ItemEdit - edit the counted quantity of items on the customer count sheet
CustomerCountSheet_ItemEditStock - edit the item's stock levels
CustomerCountSheet_List - see customer count sheets
CustomerCountSheet_Print - print the customer count sheet
CustomerCountSheet_View - allows the user access to the customer count sheet screen
Opening OrderLinx
1 Open an internet browser. IE is the supported browser.
2 Type orderlinx.net into the
URL field.
3 Type the vendor code into the
Vendor field.
4 Type the login into the
Login field.
5 Type the password into the
Password field.
6 Select the
Login button.
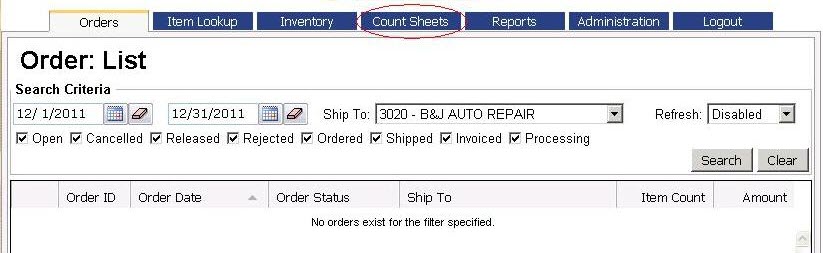
Navigating to the Count Sheet
Once OrderLinx opens, select the
Count Sheets tab.
Create an OrderLinx Count Sheet
1 Select the Add New button. The page below will be displayed.
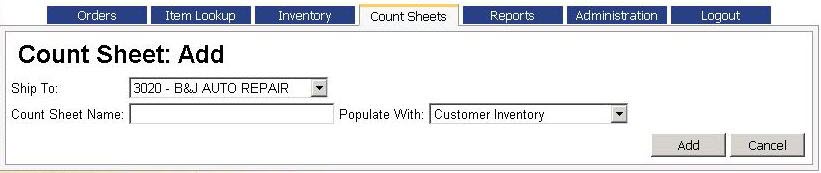
2 Select the appropriate ship to from the
Ship To dropdown.
3 Type a name into the
Count Sheet Name field.
4 Select how the count sheet should be populated with the
Populate With dropdown. There are only two options, customer inventory and blank. If the user selects blank, a customer count sheet will be created with no items.
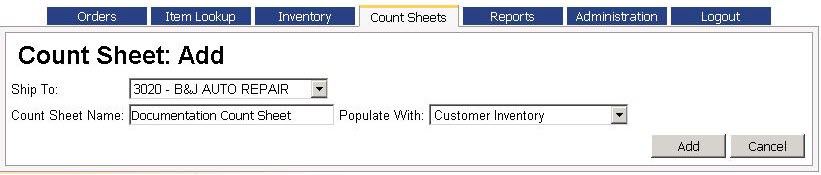
5 Select the Add button. A new customer count sheet will be created.
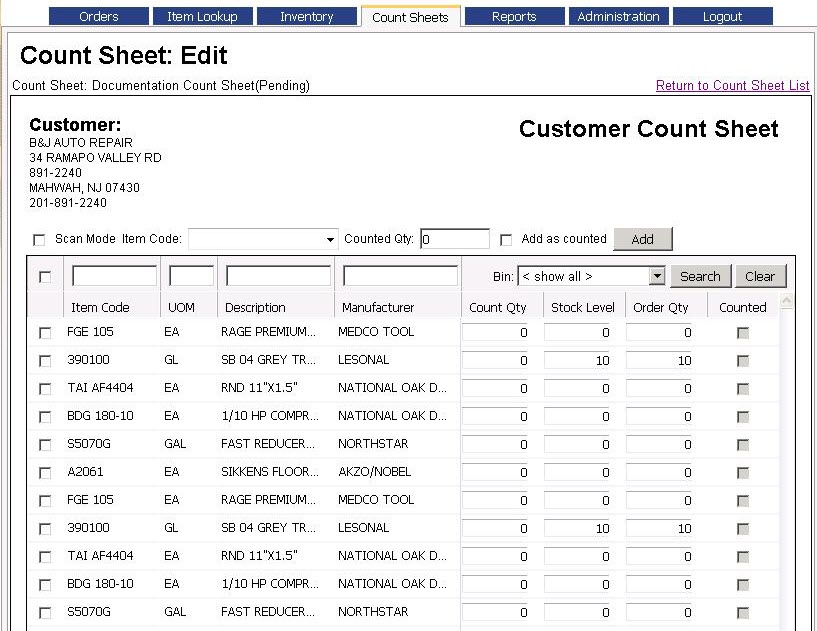
Edit a OrderLinx Count Sheet
Edit Quantities
This editing process will discuss how to change the counted, stock and Order quantities of an item on the customer count sheet.
Counted Quantity
Type the counted quantity of the item into the counted quantity field Fractional quantities are allowed.
Stock level
This field indicates the appropriate stock level the customer should have for each item.
Order Quantity
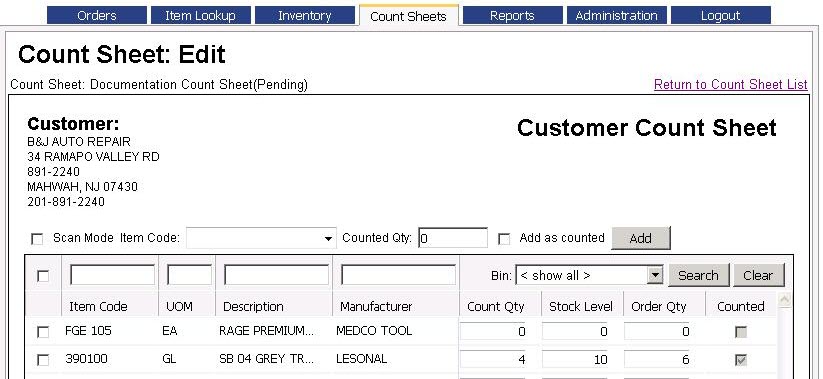
This value sets the quantity for the item on the subsequent order. The system will automatically generate the order quantity based on the counted quantity and stock level. The user has the ability to override the system generated value for any item.
Example: Item 390100 has a stock level of 10 and 4 are counted in the customer's shop. Once the
Save button is selected the system will automatically type 6 into the Order Quantity field and mark the item as counted.
Add New Items
This process is used to add new items to the OrderLinx count sheet. There are two ways to enter new items, scanning the item barcode or typing in the part number.
Note: Scanning the barcode option only works for items that have valid UPCs that match items in the Master Inventory.
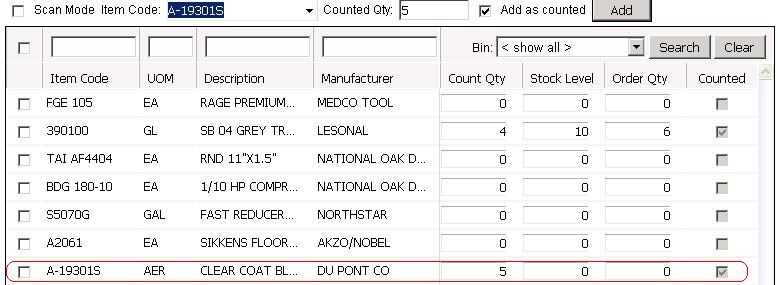
Scanning the Barcode1 Select the Scan mode checkbox.

2 Scan the item's barcode. If the UPC is found in the systme, the item will automatically add the item to the customer count sheet. If the UPC is invalid an error will be displayed.
 Manually Adding Items
1 Type the part number into the
Item Code smart dropdown. As the user types the number the system will search for the item. Once the item in displayed in the dropdown, the user will need to select the item.
2 OPTIONAL Type the quantity that is being counted into the
Counted Qty field. This will automatically add the value into the Counted Quantity field for the item when it is added to the item grid.
3 OPTIONAL Select the
Counted checkbox. This indicates to the system that the item has been fully counted.
4 Select the
Add buttton.
Before the Add button is selected.

After it is selected.
Search for Items
This option is used when a user needs to find an item on the OrderLinx count sheet. At the top of each column there is a search field. A user can use one or many of these fields inorder to narrow the search results.

Delete an Item
This process is used to delete items from the OrderLinx count sheet. If the count sheet was generated from the customer's inventory, it will not delete the item from their inventory.
1 Select the checkbox next to the desired item(s). NOTE: The checkbox at the top of the item grid is used to select or deselect all of the items in the grid.
2 Select the
Delete button.
Zero Counted Quantities
The zero counted quantities process is used to remove the counted quantities from all or specific items.
1 Select the checkbox next to the desired item(s). NOTE: The checkbox at the top of the item grid is used to select or deselect all of the items in the grid.
2 Select the
Zero Counted Quantities button.
Mark as Counted
This process is designed to tell the system that all or specific items should be marked as counted. NOTE: As the user counts items the system will automatically indicate that the items have been counted. This should only be used if the user wants to skip typing 0 into the Count Qty fields.
1 Select the checkbox next to the desired item(s). NOTE: The checkbox at the top of the item grid is used to select or deselect all of the items in the grid.
2 Select the
Mark as Counted button.
Display Usage
This option will give the user a glance at a specific item's usage without leaving the customer count sheet screen.
1 Select the checkbox next to a single item. Usage can only be displayed for one item at a time.
2 OPTIONAL Select the Include Consignments checkbox.
3 Select the Usage button.

Processing of an OrderLinx Count Sheet
Adjust Quantities
This option affects the order quantities of all the items on the OrderLinx count sheet. It it used to adjust the order quantities from 1% to 200% of their current values. If more adjustment is needed the process can be repeated.
NOTE: the original values are not saved. If the user is unhappy with the results, they will have to readjust the values or manually alter them. for example: if the original adjustment was 200%, the user can readjust it at 50% to get to the original values.
1 Select the
Adjust Qtys button.
2 Indicate the adjustment value by using the - and + buttons or type the value into the percentage field.
3 Select the
OK button.

The
Reset button will set all of the values back to the system indicated values (Stock level - counted quantity), but will not set any customer order quantity that was on the customer count sheet prior to adjusting the quantity.
The
Cancel button will close the adjust quantity window.
Finalize
This option will complete the customer count sheet and will make it uneditable.
Print
This action prints the customer count sheet. This option can be completed in the OrderLinx Count Sheets Edit screen or the OrderLinx Count Sheets List screen. This will not complete the count sheet.
Compare two OrderLinx Count Sheets
This action is used to compare key statistics of two customer count sheets. This can only be done from the OrderLinx Count Sheets List screen.
1 Select the checkbox next to the two OrderLinx count sheets that need to be compared.
2 Select the
Print button.
Save
This action saves all of the changes made since the OrderLinx count sheet was opened or last saved. The unsaved changes will appear pink on the screen.
Create Order
This action creates an order out of all the counted quantities for all of the items on the OrderLinx count sheet. This can be done on the list or edit screen, but the edit screen allows the user to enter more details for the order.
1 Complete the OrderLinx count sheet and select the Save button.
2 OPTIONAL Type a PO number into the
PO Number field.
3 Select the
Create Order button.

All of the order quantities will create an OrderLinx order.Below is a link on how to process the OrderLinx order.
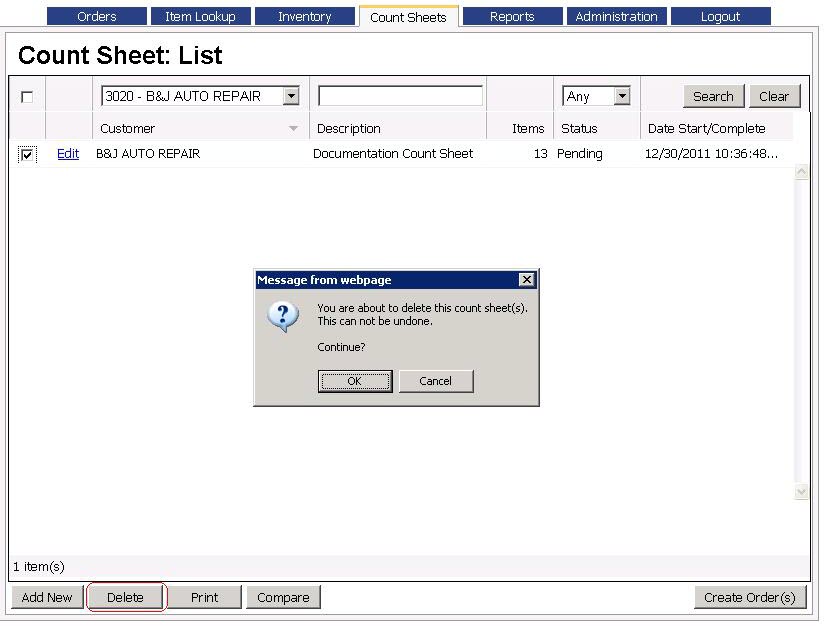
OrderLinx Orders Help DocumentationDelete an OrderLinx Count Sheet
Deleting an OrderLinx count sheet can be preformed from the OrderLinx Count Sheet List screen. This process removes the OrderLinx count sheet from the system.
1 Select the checkbox next to the OrderLinx count sheet that needs to be deleted. NOTE: The checkbox at the top of the grid is used to select or deselect all of the customer count sheets in the grid.
2 Select the
Delete button.
Select the
OK button on the message.
The
Cancel button will stop the deletion process.