Page History: Invoice Help Documentation Part 1
Compare Page Revisions
Page Revision: 10/04/2011 10:15 AM
Invoices
This task is used to:
- Create one-step invoices for customers.
- Print an invoice from a converted Work Order, Invoice Shipments, or Quote.
- Inquire into open invoices to make changes, void, and/or print.
- Inquire into released (posted) invoice history.
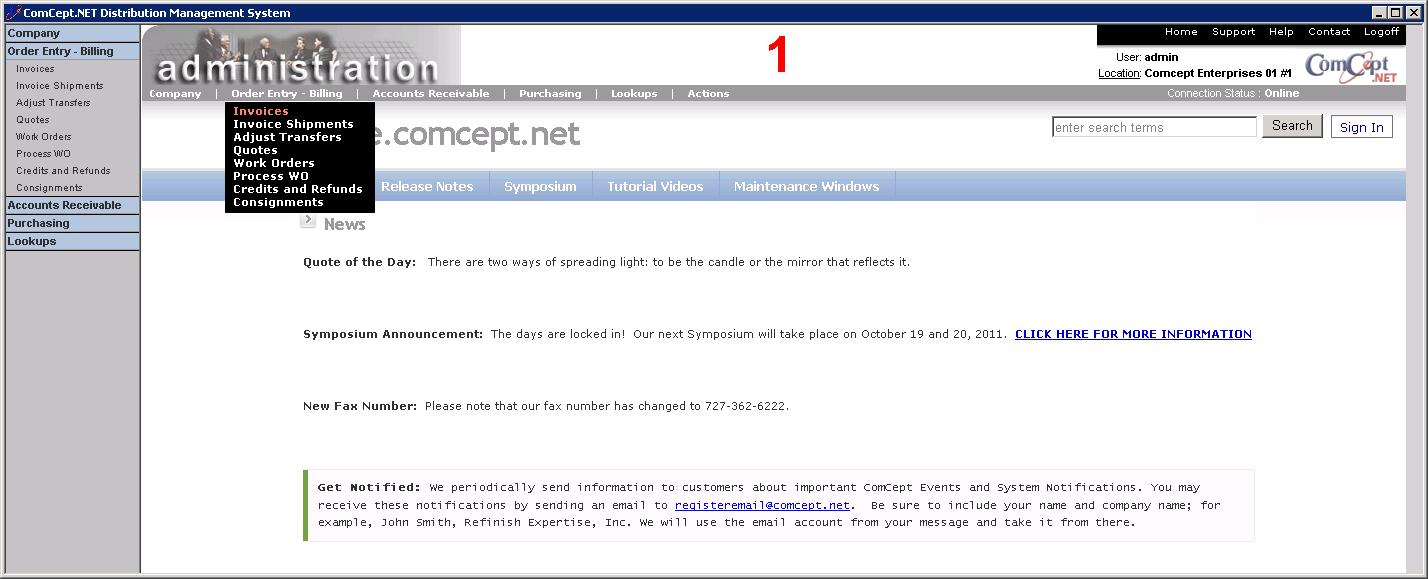
Select
Invoices from the
Navigation Bar or from the Drop Down Menu
Order Entry – Billing.
Invoice Screen
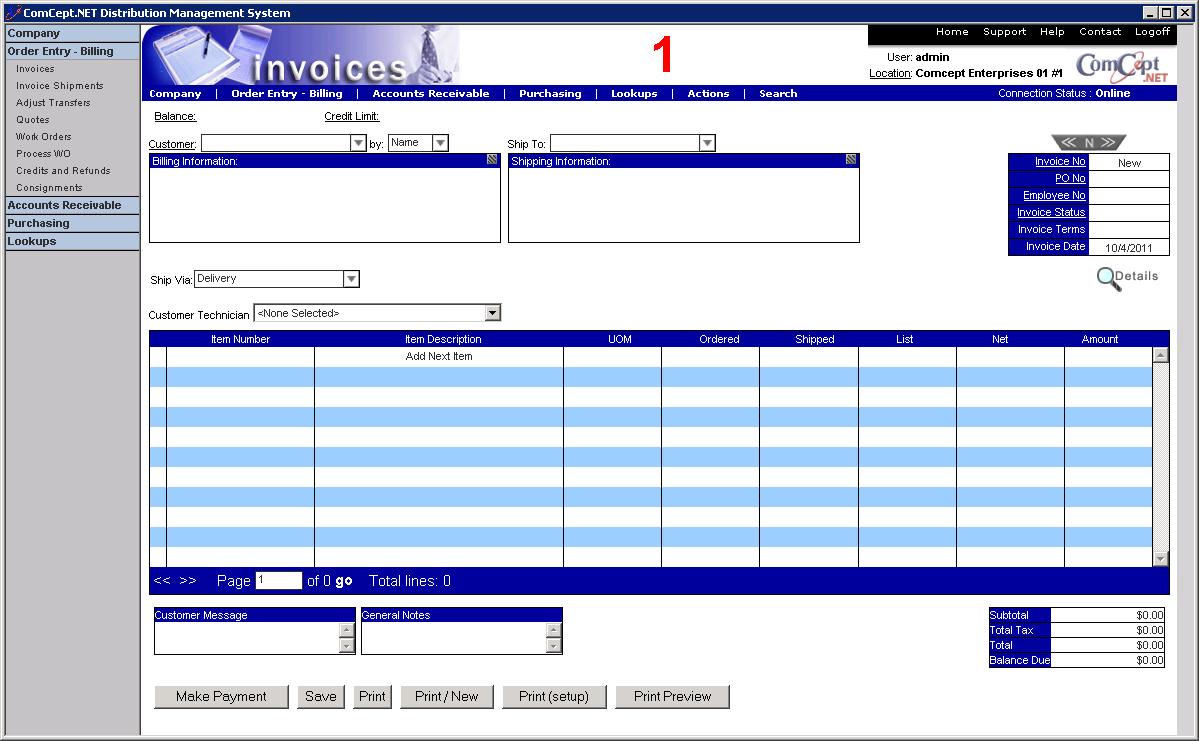
This is the
Invoices screen. It is important the
User and the
Location are correct because multiple uses and locations can be accessed from the same computer. These are located in the top right area of the screen.
The Invoice screen is made up of six areas:
- Customer billing, shipping and credit information.
- Invoice information, search, and control.
- Item billing and pricing.
- Customer messages and notes boxes.
- Invoice tax and totals boxes.
- Invoice Actions Icons.
- Customer billing, shipping, and credit information:
- Invoice Information, search, and control:
- Item Billing and Pricing:
- Customer Messages and Notes Boxes:

- Invoice Taxes and Totals Boxes:

Note: The following sections are in the same order that the
(Tab) key follows during date entry.
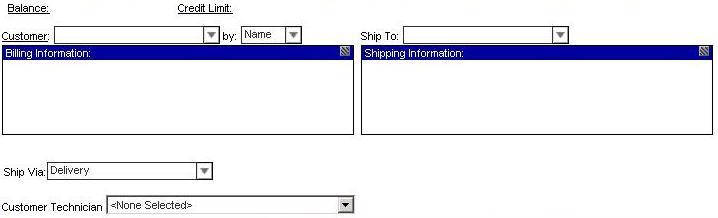
Customer Billing, Shipping, and Credit Information
Bill To Customer
The bill to and ship to customer fields are in the customer billing, shipping, and credit information area:
Select the desired Bill To customer using the two drop down boxes Customer: and by:
In the Customer field:
Begin typing the customer’s name.
Then press (Tab) to select name or select with the mouse.
Or by selecting the drop arrow and scrolling through the names.
Then press (Tab) to select name or select with the mouse.
Or by using customer search by: Customer Number (old number from conversion).
Select desired Customer Number.
Or by using customer search by: Short name.
Select desired Customer Short Name.
After the Bill To customer has been selected the customer Balance and Credit Limit is displayed along with the customer name, and address. Also, any Customer Messages setup in the customer record are displayed in a pop up window.
Select the button on the far right of the Billing Information heading line to open the Custom Details window. Changes made in this window are not permanent and will print on this invoice only.
Customer Search By Box
The second drop down box is used to specify the valued to be searched for in the Customer drop down box (please see above).
Customer Number: The customer number field from the Customer Information screen. This usually contains the old customer number from a conversion.
Description:
Name: The customer name.
Number: The customer internal CDN number.
Short: The customer short name.
Ship To Customer
After the Bill To customer has been selected, the Ship To customer may be selected from the Ship To: drop down box. This box will only display valid Ship To customers for the Bill To customer selected (established by the Parent Customer assignment in the Customer screen). The valid Ship To customers are displayed by customer name with the Customer Number appended on the end.
Open the Ship To drop down box by pressing the down arrow when in the Ship To field or select the button at the left end of the Ship To field. Select the highlighted Ship To customer using the (Tab) key or the mouse.
This shows the Bill To and Ship To customers selected.
Select the button on the far right of the Shipping Information heading line to open the Shipping Details window. Changes made in this window are not permanent and will print on this invoice only.
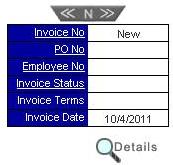
Invoice Information, Search, and Control
Invoice Control Bar
Next is the select previous invoice , new invoice , or next invoice selection bar. Tab through these unless you wish to cancel the current invoice entry and perform one of these functions.
Invoice Number
This is the invoice number (i.e. 123456) assigned when the invoice is printed or saved. This field contains the word "New" until the invoice is printed or saved the first time. An offline invoice number (i.e. 70-5-1) is temporarily assigned to invoices created when not connected to the Internet. After the connection to the Internet is made or restored, the offline invoice number is stored in the Alternate ID field and then the permanent invoice number is assigned.
Purchase Order Number
The alphanumeric customer’s Purchase Order Number is entered in the PO No field located in the Invoice Information area.
Employee Number
The alphanumeric employee number is entered in the Employee NO field immediately below the PO NO field (see above). The employee number must also be entered into the Employee Number dialog window each time an invoice is saved or printed. The employee number must be created using the Employees task before it can be used.
Ship Via
Select the desired Ship Via from the drop down box located just below the Customer Billing Information area:
Ship Via entries are maintained using the Data Maintenance task in the Table Shipping.
Header Details
Select the button to open the invoice header details dialog window to change invoice header information if required. These changes will only affect this invoice.
Sales Person: Select a different sales person.
Pricing Profile: Select a different pricing profile.
Tax Model: Select a different tax mode.
Terms Code: Select a different terms code. Use this to change a “Charge” invoice to a “Cash” invoice. This change must be saved before the next three display fields change.
Due Date: The due date as determined by the Terms Code (display only).
Discount Date: The discount date as determined by the Terms Code (display only).
Discount Offered: The discount amount as determined by the Terms Code (display only).
Created By: The employee number used to create the original invoice (display only).
Last Modified By: The last employee number used to modify the invoice (change, print, save, etc.) (display only).
Bill Forward: Select this option to change the invoice date to the first day of next month (i.e. 5/1/2002).
Bill Back: Select this option to change the invoice date to the last day of the prior month (i.e. 3/31/2002).
Original Invoice Date: Select this option to use the current date as the invoice date (i.e. 4/17/2002).
Select the Save button to record the changes or the Cancel button to discard the changes.
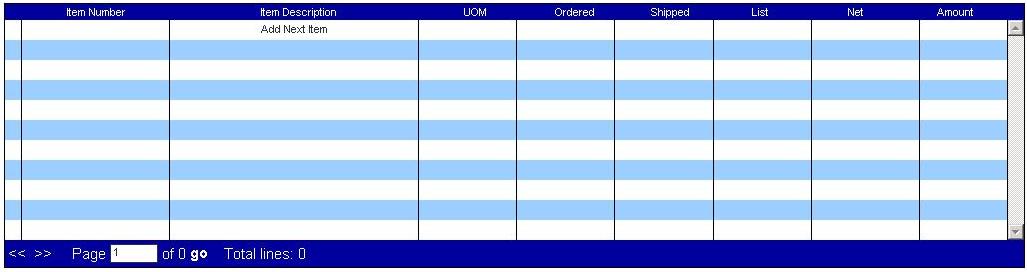
Item Billing and Pricing
Item Billing
The item billing and pricing area of the invoice is where items are entered for billing the customer.
Select the desired item using either the Item Number or the Item Description columns.
Item Number Column:
% wild card character:
Item Description Column:
% wild card character:
You can also use the down arrow to open the item or description drop down box and then scroll search for the desired item. But this is inefficient for item files with a large number of Items. Select the highlighted Item by pressing the (Tab) key or using the mouse.
Item Description
You can edit the Item Description and even add an extended description or comment if desired. Simply re-select the underlined Item Description to open the Item Description Edit Dialog Window.
Before
After
This change is only for this line item on this invoice.
UOM - Unit of Measure
Next is the UOM field.
If there is more than one selling unit of measure for the item, the drop down box opens automatically. However, the item is immediately priced using the Default Sales UOM (set up in the Master Inventory task).
Highlight the desired unit of measure and then press the (Tab) key or use the mouse.
Ordered
Next is the quantity Ordered field. Enter the quantity ordered by the customer and then press (Tab).
Shipped
Next is the quantity Shipped field. Enter the quantity shipped to the customer and then press (Tab).
Net
Next is the Net selling price field. Press (Tab) to accept the net selling price calculated as specified in Edit Customer Special Pricing and Pricing Profiles tasks or select the Net price field with the mouse to open the Line Item Details window to make adjustments.
Customer:
Trade Discount: The discount percent that will be applied to all lines on the invoice if the Apply button is selected. The default is maintained in the customer record in the Trade Discount field.
Item No: The item number entered on the invoice. Display only.
Description: The item description. Display only.
List: The List Price for the Item.
Profile: The selling price as calculated by the Customer’s Special Pricing or Pricing Profile data.
Discount: Additional discount off of the Profile selling price. The desired value can be entered.
Net: The net selling price after additional discount. The desired value can be entered.
Savings: The difference between the Profile price and the Net price. The desired value can be entered.
No Disc: Select this box to remove a discount entered and return the Net price to the original Profile price.
Can B/O: Select this box to cancel back ordered quantities.
Tax: Select this box to charge sales tax on the line item or deselect to not change sales tax.
Subtotal: The running subtotal for the invoice.
Select Save to record the pricing changes or Cancel to discard the changes and keep the original pricing.
Miscellaneous Items Billing
There are several Item Types used to define the way an item is processed. These are assigned to the item when it is setup using the Master Inventory task. Depending on the Item Type, the item description, net price, or cost may be empty or contain a generic value. Use the methods described above to change these fields as required.
Invoices (Continued)
Customer Messages and Notes Boxes
Customer Message
A free form Customer Message can be keyed in this box and will be printed in the body of the Invoice below the Balance Due line.
Note: The customer messages that are maintained in the Customer task screen can be selected to also print on the invoice.
General Notes
The General Notes are display only. They appear after the first item number has been selected. This note is generated using the information in the terms code assigned to the customer.
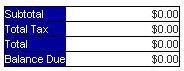
Invoice Tax and Totals Boxes
The invoice tax and totals boxes are made up of at least four totals boxes (if no sales tax is charged) and at least five totals boxes (if sales tax is charged). There may be additional sales tax boxes depending on how many sale tax jurisdictions are involved.
Subtotal: The total of the items billed to the customer before sales tax is applied. This is the amount that is recorded for sales analysis reporting.
Pinellas: The sales tax jurisdiction that this sale falls under. This is determined using a combination of the Taxes task under Company, Tax Group field in the Master Inventory task under Company, and the Tax Model field in the Customers task under Accounts Receivable. These totals are report to the tax jurisdiction by printing the Sales Tax report.
Total Tax: This is the total of all sales tax for all jurisdictions on the invoice.
Total: This is the total of the extended items selling prices and all taxes. This is the total that is added to the accounts receivable.
Balance Due: This is the remaining amount owed on the invoice.
Invoice Action Icons
Note: The on hand quantity is updated as soon as the invoice is saved or printed.
Make Payment
Opens the Payment on Cash Sale window.
Payment Type: Select the payment method(s) for this invoice and enter the Amount$ for each payment method. Select the add button to add each payment type as they are entered.
Select the OK button to save the payment or Cancel to discard the payment.
Cash or Check Payment:
Credit Card Payment:
Note: Using the Make Payment action does not Save the invoice. This must be done using one of following Actions.
Save
Saves the invoice and the invoice remains on the screen. This message is displayed to indicate the invoiced has been saved. This action updates the on hand quantity.
Print
Prints the invoice to the Windows Default Printer and the invoice remains on the screen. This message is displayed to indicate the invoiced has been printed and saved. This action updates the on hand quantity.
Print & New
Prints the invoice to the Windows Default Printer and then displays a blank invoice screen. This action updates the on hand quantity.
Confirm Save Window
The Confirm Save window is displayed if you have made changes to the current screen and attempt to start a new Invoice or to change to another action.
Note: This window is not displayed and any changes made are lost if the Home option on the Quick Link Bar is selected.
Invoice Actions Menu
The following actions are available from the Actions drop down menu while in the Invoices task.
These first four Actions also have an Icon at the bottom of the Invoice screen and where described earlier:
Make a Payment
Save Invoice
Print Invoice
Print and Create New
Go To Order
Switch to the Work Order screen/task.
Create Credit Memo
Switch to Credit Memo screen (Credits and Refunds task).
Create PO
Switch to Purchase Order/Xfers screen (Create PO/Xfer task).
Recurring Billing
Sets up the invoice currently displayed on the screen (must have been saved or printed) as a recurring invoice.
The following fields are in the Recurring Billing pop up window:
Next Billing Date: Enter the next date the invoice is to be created.
Billing Period: Enter the billing cycle (i.e. Monthly or Weekly).
Notes: Enter any information desired to describe the recurring billing invoice.
Select OK to save the information or Close to cancel changes.
The phrase will then be displayed in the top portion of the invoice above the Ship To customer information. The invoice must then be saved or printed to complete the setup process.
The generation of Recurring Bills is described in the Recurring Billing action found in the Accounts Receivable tasks.
Write Off Invoice
This action writes off a released (posted) invoice. The following adjustments are made:
The invoice is removed from the customer’s accounts receivable.
The quantities sold are NOT added back to the on hand inventory for the items on the invoice.
Historical sales are not affected (used for reports and purchasing).
The invoice to be written off must be displayed on the screen. You cannot write off an open invoice - use Void Invoice for open invoices.
You must recall the released (posted) invoice before selecting the Write off Invoice action. The Write off Invoice pop up windows has the following fields:
Write Off of Invoice xxxxx: The invoice to be written off.
Balance $xxxx.xxx: The balance remaining on the displayed invoice.
Account to write off to: Select the desired general ledger account to record the write off (i.e. General Income, Bad Debt, etc.).
Reasons for Write Off: Key the reason for the write off.
Select Write Off to record the write off or Cancel to discard the changes.
The invoice is then redisplayed with the phase WRITTEN OFF displayed in red across the face of the invoice.
When a written off invoice is reprinted, the phrase VOIDED INVOICE prints in the upper right corner.
Void Invoice
This action voids an open invoice (either printed or only saved). The following adjustments are made:
The invoice will not be added to the customer’s accounts receivable.
The quantities sold are added back to the on hand inventory for the items on the invoice.
The transaction will not be recorded in historical sales (used for reports and purchasing).
The invoice to be voided must be displayed on the screen. You cannot void a released (posted) invoice - use Write off Invoice for released (posted) invoices.
Select Actions then select Void Invoice.
The void invoice confirmation window is then displayed:
Select Yes to void the invoice or No to return to cancel the void invoice process.
The voided invoice is then redisplayed with the phase VOIDED displayed in red across the face of the invoice.
When a voided invoice is reprinted, the phase VOIDED INVOICE prints in the upper right corner.
List Shipments
Opens the Invoice Search window to search for the Related Shipments for the invoice currently displayed on the screen.
Select the desire Shipment number you wish to display.
Then close the window or drag it out of the way to view the Shipping screen detail.
Break Case
Opens the manual Break Case window.
This window can be used to break a larger Unit of Measure (UOM) into a smaller UOM. This can be used even if the items have not been set up to Auto Case Break or if the larger UOM was is larger than the one setup as the Default Purchase UOM.
Search Location Inventory
This action displays the current on hand, committed, on order, and available on hand for the locations selected. This used to search for available inventory in remote locations.
Line Item Data
This action is used to toggle between Auto and Manual for the Invoice Line Item Data option:
Auto – as each item line is entered, inquire into the master database for the current item on hand, availability, and pricing.
Manual – select the hot key or Action Get Live Values to inquire into the master database for the current item on hand, availability, and pricing for the items entered.
Get Live Values
Inquire into the master database for the current invoice line item for on hand, availability, and pricing.
Invoice Search Menu
The Invoice search action is an extremely powerful tool allowing the selection of desired invoices by a wide area of search field combinations.
Invoice searches are started by selecting one of the search links:
Customer
Invoice NO
PO No
Employee No
Invoice Status
Invoice
Or by selecting a Search option from the Menu bar:
Search options can be changed after the Search window is open. Also, select the button to open the Date Range and Customer filter options. This secondary filter option can be closed by selecting the button.
Note: For a Date Range search, you must enter both the From and the To dates for the search to function correctly.
By Customer, By Item, By Date Range
This example shows a search by Invoice by Item for Item 6334 for Customer Chris Auto Repair for the date range of 11/1/2001 to 12/31/2001.
The search returned two invoices (i.e. #3 and #29). Invoice #29 is then selected and the invoice information displays behind the search window.
You may then:
Move or close the Search window to work with the selected invoice.
Select another invoice from the displayed list.
Perform another search.
To move the Search window temporarily out of the way of the invoice:
Place the mouse pointer in the blue header line of the Search window.
Hold down the left mouse button.
Drag the window to the desired location.
Release the Mouse button.
Use the same process to move the Search window back in order to select another invoice or search.
By Offline ID
When an invoice is saved or printed in Offline Mode it is assigned an Offline ID (i.e. 70-5-1). When the computer is reconnected to the Internet, offline invoices are updated on the central database and assigned an official Invoice Number. The Offline ID (also known as the Alternate ID) is displayed along with the official Invoice Number on most screens and reports.
The Offline ID can be searched for by selecting the Invoice by Alternate ID in the Search For drop down box.
Both the Offline ID and the Invoice No are in the Unposted Transaction Journal and the Customer Statement. They are also displayed on the Invoices and Receive Payments screens.